Recently on Modelflight's YouTube Channel, we added a video which demonstrated the process of transmitter mode conversion. In this post, we will walk you through the steps required to complete this procedure.
As we have discussed in a previous blog post, Mode 1 transmitters have the throttle located on the right-hand-side stick, whereas Mode 2 transmitters have the throttle on the left stick. You may want to change your transmitter's mode to suit your personal preferences or to adapt to the model you are flying (generally speaking, we have found that RC plane pilots prefer Mode 1 transmitters, whereas helicopter pilots prefer Mode 2).
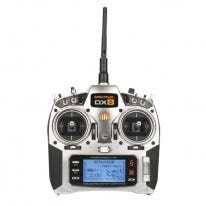
You can watch Matt's transmitter mode change film below. In this how to video, Matt uses the Spektrum DX8 as an example, but this procedure can also be applied to the Spektrum DX7S and DX18.
To summarise, here are the steps you need to take to convert Mode 1 to Mode 2:
- Remove the rubber handles from the transmitter
- Peel back the side grips about halfway, in order to remove the back of the transmitter
- Unscrew the back of the transmitter
- Remove the back of the transmitter and disconnect the plug that connects the back cover to the transmitter
- Remove the screws above the momentary switches (two screws on either side)
- Move the switchboards up to give yourself access to the screws that hold the gimbal cages
- Remove the screws that hold the gimbal cages (four screws for each cage). This will give you access to the throttle limiters which are located under the throttle stick.
- Unscrew the throttle limiters and place them under the other transmitter stick
- Put the gimbal cages back and screw them into position
- Return the switchboards to their previous position. Take note that each switch has one long and one short screw. The longer screw goes into the the switchboard's base and the short at the top hole
- Now that the throttle has been switched to the other side, remove the screw located to the right of the throttle stick (Matt points out this screw around the 7 minutes, 29 second mark of the video). This disables the "return to centre" function on the transmitter
- Reattach the back of the transmitter by first reconnecting the plug that links the transmitter case to the electronics
- Screw the transmitter case back together
- Refit the rubber side grips to the transmitter. You may need to use a screwdriver to align the grips with the pins in the transmitter
- Reattach the hand grips to the transmitter, ensuring that the locating holes are aligned. This completes the mechancial part of the procedure.
- The final part of the procedure involves the electronics. To begin, hold down your transmitter's scroll bar and switch the radio on
- Scroll down to System Settings
- In the System Settings menu, scroll down to "Mode" and change the Mode to "2"
- Click on the Next button. This will take you to the Extra Settings menu. Because there are no other changes to make, hit the Next button again. This will take you to the Callibrate menu
- Move the sticks around before returning them to the centre
- Turn the dial at the top of the transmitter around until all the sections of the Callibrate menu read "Ok"
- Scroll across to "Save" and hit enter. You may need to move the throttle sticks down to finish this procedure
And that's how you can change transmitter modes. We hope this blog post and video helps you through this procedure. Of course, should you have any questions, you are welcome to leave us a comment below or you can visit our website to contact Modelflight. Stay tuned to this blog for more practical how to guides.