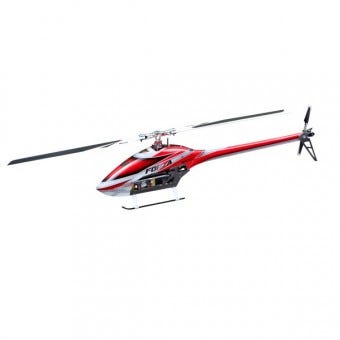
This is a guest blog post from Modelflight team member, Matt. It shows photographs taken as Matt assembled the JR Forza 700 RC helicopter, with his commentary added underneath each image. We recommend referring to this post in conjunction with the Forza 700 manual as you assemble this product.
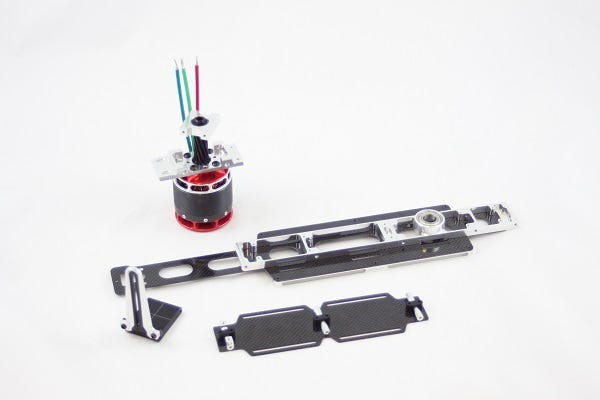
My initial thoughts after opening the Forza 700 box and laying out all the bits and pieces ready for assembly, was that all the machining on the metal parts and the finish on the carbon fibre parts are equal to the supreme quality of the earlier JR Vibe series. JR have done an excellent job maintaining the quality and also offering a product at a reasonable price. Step one is a fairly simple step. We chose the Kontronik Pyro 750 50 motor for this build. In the photo above, you can see the motor with the pinion assembly, lower frame battery support and the front bed along with the swash-plate autorotation arm.
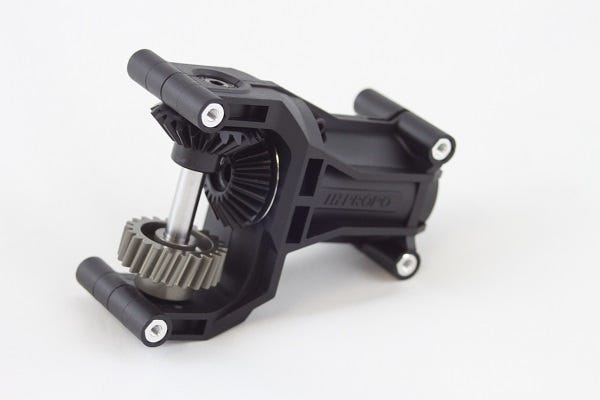
In the next step, you need to assemble the small gear drive system and boom mount. Then dry-fit this piece between the two upper main side frames.
At this point, I do recommend jumping ahead to Step 4-1 in the Forza 700 manual to install the rear cyclic servo, as it will be difficult to do so when the frames are together. In this photo, you can see how things start to come together. Here the upper side frames are constructed including the previously assembled parts and the 12mm main shaft bearing blocks.
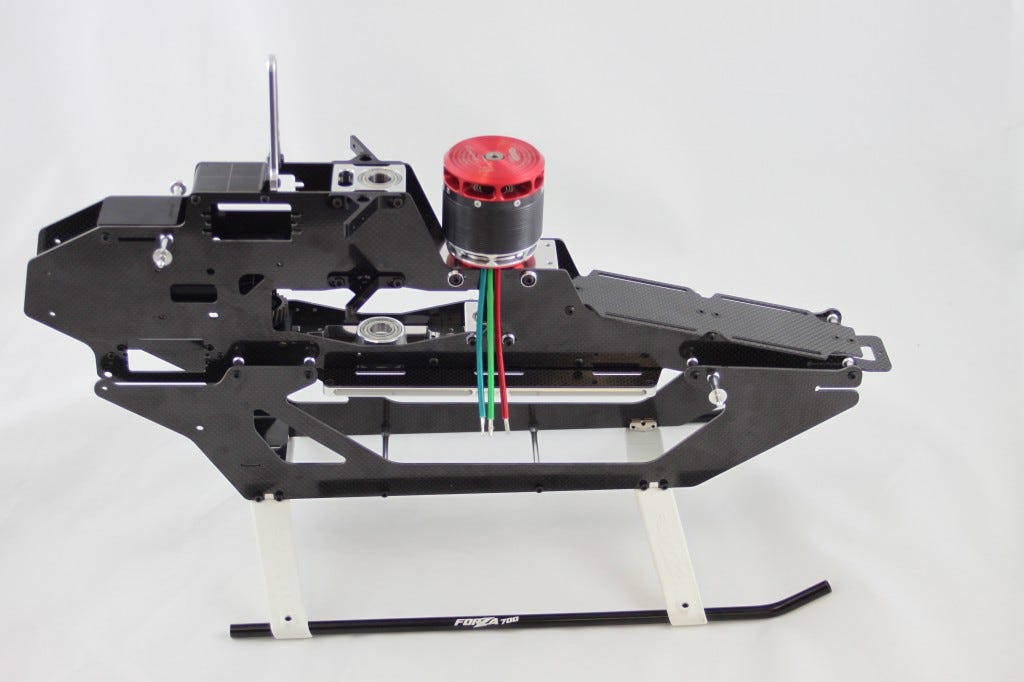
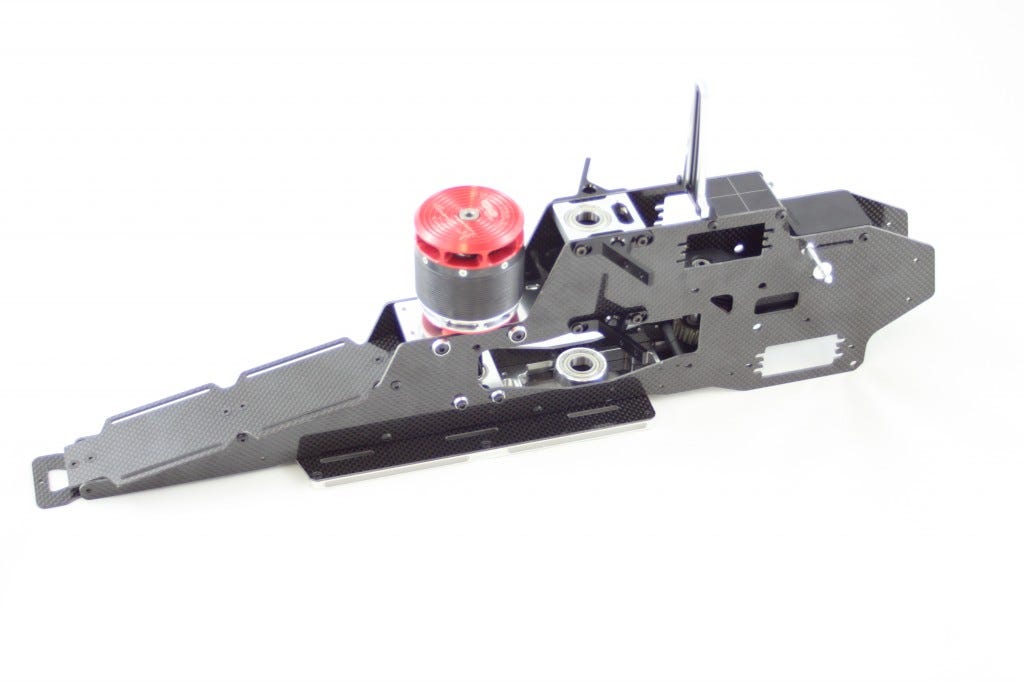
You can see here the main frame completely constructed. The frame is simple, but functional in design. Because of this, I was able to get to this stage of assembly within three hours. One of the features that makes this model so easy to build is the direct servo-to-swash plate linkages. The earlier Vibe 90 helicopters used a bell crank system, which I found overcomplicated the heli.

Installing the main and tail drive grear is very easy. The motor mounting plate bolts were left loose up to this stage, to allow us to adjust the pinion mesh before tightening.
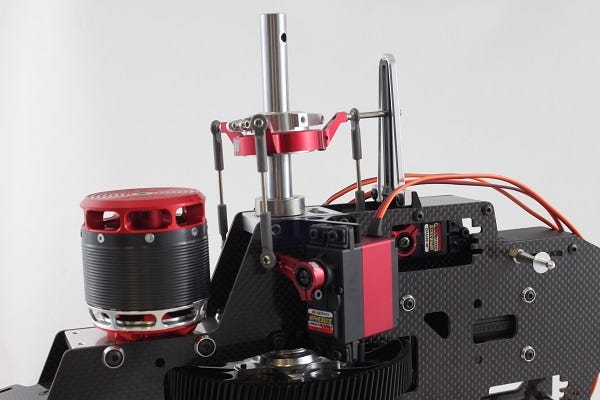
JR includes a gauge to use when adjusting the lengths of the linkages between the servos and the swash. So far, its all looking very neat and tidy. We chose to go with the JR MPH83SMKII. This servo will be perfect for what we want to do with this heli.
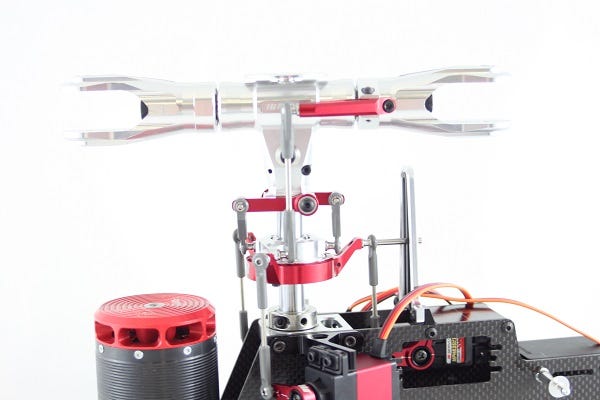
Shiny! Once assembled the low profile flybarless head assembly is extremely rigid. This heli is going to feel crisp in the air. No need to upgrade any components on this machine, its already done for you!

The only part of this model where you dont need any tools to assemble is the tail pushrod. This is assembled using CA adhesive. Some careful measuring, a few drops of CA and youre done.
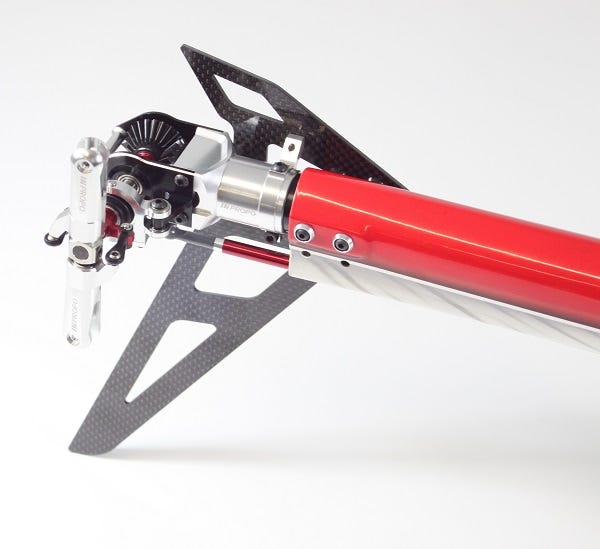
The tail gear box is similar in design to the earlier Vibe 90. The Forza 700 reuses the design with the addition of heavy duty bevel gears and metal tail rotor blade grips.
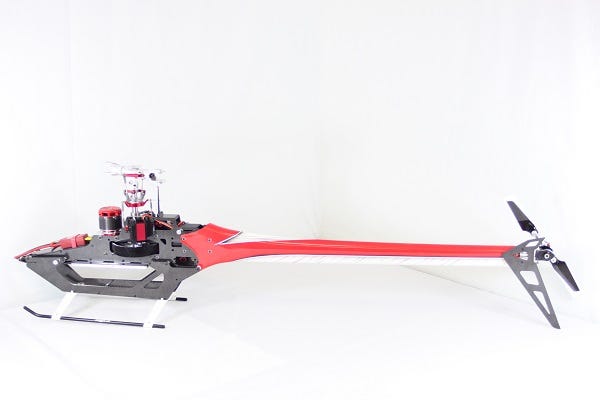
A new feature on JR 3D helicopters is the tail fairing. On the Forza 700 this carbon fibre fairing hides the boom and tail pushrod keeping things neat. This new addition will also become beneficial whilst flying backward, offering better aerodynamics for faster flight.
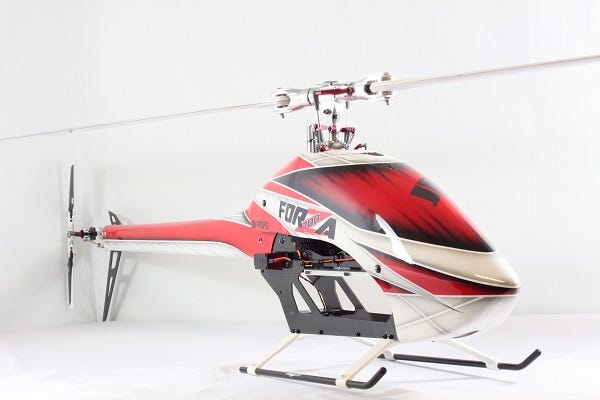
And here it is, JRs 700 size helicopter completely revisited. All the good bits from previous models and the addition of new ideas will definitely secure its place in the high-end, high performance category. This is a high-end helicopter with the best products to support it. Weve gone all Kontronik for the power system, JR for the servos, Thunder Power batteries and Beast-X flybarless system. This thing looks angry, itll be a weapon!